LabSPX https://labspx.com/ Optimize your laboratory Tue, 06 Oct 2026 08:20:43 +0000 en-US hourly 1 https://wordpress.org/?v=7.1.4 https://labspx.com/wp-content/uploads/2025/09/cropped-LabSPX-RGB-icon-32x32.png LabSPX https://labspx.com/ 32 32 How can you reduce autoclave cycle time? https://labspx.com/how-can-you-reduce-autoclave-cycle-time/ https://labspx.com/how-can-you-reduce-autoclave-cycle-time/#respond Tue, 06 Oct 2026 08:20:41 +0000 https://labspx.com/?p=5033 When an autoclave becomes a bottleneck in the laboratory, adding a second unit may seem like the obvious solution. But limited capacity is not always the real problem. In many cases, long cycle times are responsible for the low throughput. Before investing in another autoclave, it is therefore useful to understand where the time within […]

The post How can you reduce autoclave cycle time? appeared first on LabSPX.

]]>

When an autoclave becomes a bottleneck in the laboratory, adding a second unit may seem like the obvious solution. But limited capacity is not always the real problem. In many cases, long cycle times are responsible for the low throughput.

Before investing in another autoclave, it is therefore useful to understand where the time within each cycle is actually being spent.

An autoclave cycle consists of several stages, including heating, air removal, sterilization, cooling and, depending on the application, drying. The validated sterilization phase should not simply be shortened to save time. Instead, improvements should focus on the stages surrounding it.

Depending on the load, significant time may be spent on:

  • Removing air from the chamber and load
  • Heating the load to sterilization temperature
  • Generating and supplying steam
  • Drying porous or wrapped materials
  • Cooling liquids safely
  • Preparing the autoclave for the next cycle

Identifying which of these stages is limiting throughput is the first step towards improving autoclave efficiency.

Start by analyzing your autoclave cycles

Rather than assuming which part of the process is responsible for long cycles, examine actual cycle data.

Modern autoclaves can record process information such as temperature, pressure and cycle duration. Reviewing several representative cycles can reveal whether most of the time is being spent during heating, sterilization, drying or cooling.

It is important to look at multiple cycles rather than one particularly slow run. Ideally, evaluate cycles over a representative period and compare different load types.

For example:

  • Wrapped and porous loads: air removal and drying can contribute significantly to total cycle time.
  • Liquid and media loads: heating and cooling are often important contributors.
  • Waste loads: air removal and heat penetration can affect how quickly sterilization conditions are achieved.
  • High-throughput laboratories: loading, unloading and turnaround between cycles can also become limiting factors.

Once the slowest stage has been identified, improvements can be targeted much more effectively.

1. Improve air removal

Air inside an autoclave is one of the factors that can interfere with efficient steam sterilization.

For sterilization to occur effectively, steam needs to reach the surfaces and materials being processed. Air pockets can reduce steam contact and make it more difficult for parts of the load to reach the required conditions.

This is particularly relevant for loads such as:

  • Wrapped instruments
  • Porous materials
  • Textiles
  • Certain waste loads
  • Containers or loads with spaces where air can become trapped

Gravity-displacement or free-steaming processes remove air by allowing incoming steam to gradually displace it from the chamber. This can be suitable for relatively straightforward loads, but more complex or porous loads can make air removal more difficult.

A pre-vacuum system actively removes air before the sterilization phase. This can improve steam penetration and help the load reach the required sterilization conditions more uniformly.

If cycle records show that air removal and heat-up are consistently slow for porous, wrapped or complex loads, the air-removal method is therefore worth investigating.

2. Improve the drying stage

Drying is particularly important for wrapped instruments and porous materials.

A load may have completed the sterilization phase successfully while still containing residual moisture. For wrapped sterile materials, excessive moisture can make the load unsuitable for storage or immediate use and can increase the risk of contamination after removal from the autoclave.

Drying should therefore be treated as a distinct part of the cycle rather than simply an extension of sterilization.

Depending on the autoclave configuration, drying performance can be supported by:

  • Post-vacuum stages
  • A heated chamber jacket
  • Controlled chamber heating
  • Appropriate cycle programming

Vacuum helps remove steam and moisture from the chamber, while chamber heating can provide the energy required for remaining moisture to evaporate.

For laboratories processing substantial quantities of wrapped or porous materials, drying performance can have a considerable effect on both cycle duration and overall throughput.

3. Make sure liquid loads reach temperature efficiently

Liquid loads behave differently from instruments, glassware and other solid materials.

The chamber itself may reach the selected sterilization temperature before the liquid inside a bottle or container does. Larger liquid volumes can take considerably longer to heat throughout.

For this reason, the temperature of the chamber alone does not always indicate that the entire load has reached sterilization conditions.

Some autoclaves can use a load or reference probe positioned inside a representative container. The sterilization hold then begins according to the measured load temperature rather than relying solely on chamber temperature.

This approach can help ensure that the sterilization period starts at the appropriate point without unnecessarily extending every cycle to compensate for the slowest possible load.

4. Consider how steam is generated

Steam generation also influences how quickly an autoclave can reach operating conditions.

Depending on the autoclave design and installation, steam may be generated using:

  • Chamber heaters
  • An integral steam generator
  • An external or central steam supply

An integral steam generator produces steam specifically for the autoclave and can support rapid steam availability between cycles. However, whether this improves throughput in practice depends on the existing system, load types and available utilities.

If a large proportion of cycle time is consistently spent reaching operating temperature, the steam supply and heating configuration are worth evaluating.

5. Look at cooling performance for liquid loads

For liquid sterilization, cooling can represent a substantial part of the total cycle.

Large bottles and dense liquid loads retain heat for a long time. They also cannot always be depressurized or cooled rapidly without considering the risk of boiling, container breakage or liquid loss.

Different autoclave configurations can use technologies such as:

  • Cooling fans
  • Water-cooled chamber jackets
  • Controlled cooling systems
  • Air ballast or support pressure

The appropriate cooling method depends on the type of containers, liquid volume, load configuration and process requirements.

If liquid cycles dominate the laboratory workload, reducing cooling time safely may provide a greater improvement in throughput than modifying another part of the cycle.

Don’t overlook turnaround time

The programmed autoclave cycle is not the only factor affecting daily throughput.

Consider the complete period between one load entering the autoclave and the next load starting. Additional time may be lost through:

  • Waiting for loads to be prepared
  • Loading and unloading
  • Waiting for items to become safe to handle
  • Selecting or configuring programmes
  • Cleaning between particular applications
  • Documentation and cycle release procedures

In a busy laboratory, relatively small delays between cycles can add up to a substantial amount of unused capacity over the course of a day.

Improving workflow around the autoclave may therefore increase throughput without changing the sterilization process itself.

When does a second autoclave make sense?

Optimizing cycle time does not mean that a second autoclave is never necessary.

Additional capacity may be justified when:

  • The existing autoclave is operating close to capacity throughout the working day.
  • Several departments depend on the same unit.
  • Different load types regularly compete for available cycle time.
  • Sterile processing requirements are increasing.
  • Separating clean and contaminated workflows would improve operations.
  • Redundancy is required to maintain operations during servicing or downtime.

However, if one particular cycle stage is responsible for most of the delay, addressing that stage may be more effective than immediately adding another machine.

A practical approach to improving autoclave throughput

Before changing the autoclave configuration or investing in additional equipment:

  1. Identify your main load types. Determine how much of the workload consists of liquids, media, waste, glassware, wrapped instruments or porous materials.
  2. Review representative cycle data. Analyse several cycles over a normal working period.
  3. Break the cycle into stages. Compare heating, air removal, sterilization, drying and cooling times.
  4. Find the main constraint. Focus on the stage that consistently contributes most to total processing time.
  5. Match the solution to the problem. Vacuum, improved drying, steam generation and accelerated cooling solve different problems and should not be treated as interchangeable upgrades.
  6. Measure the result. After making a change, compare cycle times and daily throughput again.
  7. Evaluate additional capacity afterwards. If throughput remains insufficient, a second autoclave may then be the appropriate solution.

Improve the process before increasing capacity

Reducing autoclave cycle time is not about shortening sterilization conditions simply to make a cycle faster. Sterilization parameters must continue to meet the requirements of the load, process and applicable validation procedures.

Instead, laboratories can look at the stages surrounding the sterilization hold.

For wrapped and porous loads, air removal and drying may deserve particular attention. For liquid loads, heating and cooling can be more significant. In other laboratories, steam availability or simply the workflow between consecutive runs may be the limiting factor.

Understanding where cycle time is actually being spent makes it possible to target improvements where they have the greatest effect, and to determine whether additional autoclave capacity is really necessary.

Our autoclaves

Explore our autoclaves here

The post How can you reduce autoclave cycle time? appeared first on LabSPX.

]]>
https://labspx.com/how-can-you-reduce-autoclave-cycle-time/feed/ 0
Why are sterilized loads still wet after autoclaving? https://labspx.com/why-are-sterilized-loads-still-wet-after-autoclaving/ https://labspx.com/why-are-sterilized-loads-still-wet-after-autoclaving/#respond Tue, 06 Oct 2026 07:07:16 +0000 https://labspx.com/?p=5028 A successful autoclave cycle does not necessarily mean that every load is ready for immediate use. For wrapped instruments, textiles and other porous materials, sterilization is only part of the requirement. The load must also leave the autoclave sufficiently dry. Residual moisture can compromise the integrity of wrapped sterile packs after they leave the autoclave. […]

The post Why are sterilized loads still wet after autoclaving? appeared first on LabSPX.

]]>

A successful autoclave cycle does not necessarily mean that every load is ready for immediate use. For wrapped instruments, textiles and other porous materials, sterilization is only part of the requirement. The load must also leave the autoclave sufficiently dry.

Residual moisture can compromise the integrity of wrapped sterile packs after they leave the autoclave. This makes drying an important consideration when selecting an autoclave for porous and wrapped loads.

Achieving both effective steam penetration and reliable drying typically depends on three closely related features: a vacuum system, a heated chamber jacket and an appropriate steam supply.

Why do wrapped and porous loads require vacuum?

Air removal is essential for effective steam sterilization. Steam must come into direct contact with the surfaces being sterilized, and trapped air can prevent this from happening.

This is particularly important for loads such as:

  • Wrapped instrument sets
  • Textiles
  • Porous materials
  • Loads with complex geometries where air can become trapped

In a simpler gravity-displacement autoclave, incoming steam gradually displaces the air inside the chamber. This can be suitable for certain types of loads, such as open glassware, but wrapped and porous materials present a greater challenge because air can remain trapped between layers or inside the load.

A vacuum autoclave actively removes air from the chamber before sterilization. Pre-vacuum stages help evacuate trapped air so that steam can penetrate the load more effectively.

Vacuum therefore plays an important role in achieving reliable sterilization of loads that are difficult for steam to penetrate.

Why is post-vacuum important?

Vacuum can also be used after the sterilization phase.

Once the sterilization hold has been completed, the load still contains heat and moisture. As the chamber and load begin to cool, remaining steam can condense on or inside the materials.

A post-vacuum stage helps remove steam and moisture from the chamber and load before this condensation becomes a problem.

However, vacuum alone does not necessarily provide sufficient drying. The chamber must also remain warm enough for residual moisture to evaporate effectively.

This is where the chamber jacket becomes important.

What does a chamber jacket do?

A chamber jacket surrounds the sterilization chamber and helps maintain its temperature during the drying phase.

Rather than introducing additional steam directly into the chamber, the jacket supplies heat through the chamber wall. This helps residual moisture evaporate while reducing the risk of steam condensing again as the load cools.

The combination of vacuum and heat therefore addresses two different parts of the drying process:

Vacuum removes moisture and steam from the chamber, while the heated jacket provides the energy needed to evaporate remaining moisture.

For wrapped and porous loads, these functions work together to improve drying performance.

Why is a steam generator needed?

A heated jacket requires a suitable source of steam.

Depending on the autoclave installation, this may come from an integral steam generator built into the autoclave or from an external steam supply available within the facility.

An integral steam generator allows the autoclave to generate the steam required for both sterilization and jacket heating without depending on a central steam system.

The exact configuration depends on the autoclave design and the utilities available at the installation site.

Explore our steam generator here.

How vacuum, the chamber jacket and steam generation work together

For applications where wrapped or porous loads need to leave the autoclave sterile and dry, vacuum, chamber heating and steam generation should not be considered completely separate features.

They form part of the same process.

Before sterilization, vacuum removes air that could prevent effective steam penetration.

During sterilization, saturated steam provides the conditions required for sterilization.

After sterilization, vacuum helps remove steam and moisture from the load.

During drying, the heated chamber jacket maintains the temperature needed to encourage remaining moisture to evaporate.

Together, these stages allow an autoclave to handle loads that require more than a conventional sterilization cycle.

Can a vacuum autoclave also sterilize glassware and liquids?

A vacuum autoclave does not have to be used exclusively for wrapped instruments or porous loads.

Depending on the autoclave configuration and available programmes, the same system may also be used for other common laboratory applications, including glassware, certain liquid loads and the decontamination of laboratory waste.

Different load types should, however, be processed using appropriate cycles. A wrapped instrument load has very different requirements from a bottle of liquid or a container of contaminated laboratory waste.

Modern laboratory autoclaves can therefore offer multiple cycle programmes designed around different load types rather than requiring one cycle to accommodate every application.

Do you need more than one autoclave?

For laboratories with high throughput, it may be useful to divide work between different autoclaves rather than purchasing two identical systems.

For example, a vacuum-equipped, jacketed autoclave can be reserved for wrapped and porous loads that require its additional capabilities, while a simpler autoclave handles routine glassware, liquids or waste.

Whether this is appropriate depends on the laboratory’s workload, load types and required throughput.

The important point is to specify autoclaves according to the loads they actually need to process rather than assuming every application requires the same configuration.

What does a wrapped-instrument cycle look like?

Wrapped instruments are generally processed using a cycle specifically designed for porous or wrapped loads.

Such a cycle can include:

  1. Pre-vacuum stages to remove air
  2. Steam admission and heating
  3. A sterilization hold at the required temperature and time
  4. Post-vacuum to remove steam and moisture
  5. Heated drying
  6. Controlled return to atmospheric pressure

The exact temperature, sterilization time and drying parameters depend on the load, applicable procedures, equipment and validation requirements.

For example, some wrapped-instrument cycles operate at approximately 134°C with relatively short sterilization hold times, while other applications use different time-temperature combinations.

Waste and liquid loads require different cycle conditions and should be processed using programmes appropriate to those materials.

How do you know if you need a vacuum autoclave?

The type of loads processed in the laboratory should be the starting point when selecting an autoclave.

A vacuum-equipped system should be considered when routinely sterilizing wrapped instruments, textiles or porous materials where trapped air could interfere with steam penetration.

It may also be appropriate when loads need to leave the autoclave dry and ready for subsequent handling or storage.

If an existing autoclave regularly produces damp wrapped packs, this can also indicate that the machine or cycle is not configured appropriately for the load being processed.

In these situations, simply increasing the sterilization time does not necessarily solve the underlying problem. Air removal, moisture removal and drying performance all need to be considered.

Sterilization and drying are different processes

The distinction between sterilization and drying is important when evaluating autoclave performance.

Sterilization is concerned with achieving the required conditions throughout the load for the specified period. Drying is concerned with removing residual moisture afterwards while maintaining suitable conditions inside the chamber.

For straightforward laboratory loads, a simpler autoclave configuration may be sufficient. Wrapped and porous loads place additional demands on the system because both steam penetration and subsequent moisture removal become critical.

Understanding the roles of vacuum, chamber heating and steam generation therefore makes it easier to specify an autoclave according to the actual application rather than selecting features in isolation.

For laboratories processing a variety of load types, the most suitable configuration ultimately depends on what is being sterilized, how it is packaged and whether the load must leave the chamber dry as well as sterile.

Our autoclaves

Explore our autoclaves here

The post Why are sterilized loads still wet after autoclaving? appeared first on LabSPX.

]]>
https://labspx.com/why-are-sterilized-loads-still-wet-after-autoclaving/feed/ 0
Mistakes when storing samples in freezers and refrigerators https://labspx.com/mistakes-when-storing-laboratory-samples-in-freezers-and-refrigerators/ https://labspx.com/mistakes-when-storing-laboratory-samples-in-freezers-and-refrigerators/#respond Tue, 15 Sep 2026 13:06:23 +0000 https://labspx.com/?p=4881 Sample integrity depends on more than setting a temperature to −20 °C and closing the door. Temperature excursions, poor sample placement, inconsistent defrost cycles, and inadequate monitoring can put stored samples at risk in analytical, clinical, and biobanking laboratories. A freezer failure can compromise valuable samples and affect the reliability of long-term studies or regulated […]

The post Mistakes when storing samples in freezers and refrigerators appeared first on LabSPX.

]]>

Sample integrity depends on more than setting a temperature to −20 °C and closing the door. Temperature excursions, poor sample placement, inconsistent defrost cycles, and inadequate monitoring can put stored samples at risk in analytical, clinical, and biobanking laboratories.

A freezer failure can compromise valuable samples and affect the reliability of long-term studies or regulated work. This post covers the most common storage mistakes, good storage practices, and monitoring approaches that can help detect problems before they lead to sample loss.

Overview

MistakeConsequenceBest practice
Wrong storage temperatureSample degradationMatch temperature to sample type
Repeated freeze-thawSample degradationAliquot samples
Overloaded freezerTemperature gradients and slow recoveryStay below the recommended capacity
Poor monitoringMissed excursionsUse continuous independent monitoring
Frequent door openingsSlow temperature recoveryOrganized inventory

Key takeaways

Laboratory sample storage failures are commonly associated with:

  • Incorrect storage temperatures
  • Repeated freeze-thaw cycles
  • Overloaded freezers
  • Inadequate temperature monitoring
  • Poor inventory management
  • Lack of contingency planning

Why laboratory sample storage failures are so costly

A failed −80 °C freezer holding a biobank of plasma or tissue samples cannot simply be replaced with fresh material. Many samples represent unrepeatable time points, from clinical trial baseline samples to environmental samples tied to a specific collection date. ISO 20387 provides requirements and guidance for managing risks and maintaining the quality and integrity of biological material in biobanking, including the control of storage conditions.

The financial impact can also be significant. A single ultra-low-temperature freezer may contain samples whose scientific or research value far exceeds the replacement cost of the equipment itself. This makes sample storage more than a technical issue: reliable storage and monitoring are also important for quality management, traceability, and compliance.

Setting the wrong temperature for the sample type

One of the most common mistakes is applying a single storage temperature to sample types with different stability requirements. Storage conditions should be selected based on the sample type, its intended use, and validated storage requirements.

  • Whole blood and serum may be stored at 2–8 °C for short-term storage, but the acceptable storage time depends on the sample type, analyte, processing conditions, and analytical method.
  • RNA is generally more susceptible to degradation than DNA and is commonly stored at −80 °C for long-term preservation, depending on the sample type and application.
  • DNA is generally more stable than RNA and can often be stored at −20 °C for long-term use, depending on the sample type and application.
  • Enzymes and other proteins have sample-specific storage requirements. Some require freezing at −20 °C or −80 °C, while stabilizers such as glycerol may be used for certain preparations.
  • Live cells intended for long-term cryopreservation are typically frozen using a controlled-rate process and stored at cryogenic temperatures, often in the vapor phase of liquid nitrogen. Standard laboratory freezers are not suitable for long-term cryogenic storage of these samples.

Using the same storage temperature for all nucleic acid samples can increase the risk of sample degradation. RNA generally requires more stringent storage conditions than DNA, so storage recommendations should be based on the sample type, stability requirements, and intended application.

Ignoring freeze-thaw cycle limits

Repeated freeze-thaw cycling is an important source of sample degradation. Each cycle can cause physical and chemical changes that affect sample integrity, including protein denaturation, loss of biological activity, and degradation of some nucleic acids. The impact depends on the sample type, storage conditions, and number of freeze-thaw cycles.

Some proteins, antibodies, and other sensitive analytes can be affected by repeated freeze-thaw cycles, while others are relatively stable. The common mistake is storing an entire sample in one vial and repeatedly thawing and refreezing it for sequential testing. A better approach is to prepare appropriate aliquots before initial freezing, so individual portions can be thawed when needed without repeatedly exposing the entire sample to temperature changes.

The appropriate aliquot volume depends on the sample type, test requirements, and expected use. Smaller, single-use aliquots can help minimize unnecessary freeze-thaw cycles and preserve the integrity of the remaining sample.

Overloading freezer and refrigerator capacity

Manufacturers specify recommended loading capacities and operating conditions for laboratory freezers and refrigerators. Exceeding these limits can restrict airflow, reduce temperature uniformity, and extend temperature recovery after door openings.

Overloading can also make it more difficult for the unit to maintain stable conditions throughout the storage space. Temperature differences may occur between different locations within the chamber, particularly when airflow is restricted or when the unit is frequently opened.

For this reason, laboratories should follow the manufacturer’s recommended loading capacity and avoid blocking vents or airflow paths. Samples should also be organized to allow adequate air circulation and minimize unnecessary door openings. Temperature mapping and independent monitoring can help identify areas where storage conditions are less stable.

Poor door management and door opening frequency

Every time an ultra-low-temperature freezer is opened, warm ambient air enters the chamber and the internal temperature can fluctuate. The time required to return to the target temperature depends on factors such as the freezer design, duration of the door opening, ambient conditions, and how frequently the unit is accessed.

In high-traffic laboratories, frequent door openings can increase temperature fluctuations and make it more difficult for the freezer to maintain stable storage conditions.

Common contributing mistakes include:

  • Leaving the door open while searching for a specific box or vial instead of preparing an inventory map and retrieving contents efficiently.
  • Storing frequently accessed samples in a location that requires repeated access to the main freezer, rather than using an appropriate solution such as a dedicated refrigerator or freezer for samples with higher access frequency.
  • Skipping door gasket inspections. A damaged or poorly sealing gasket can allow warm air to enter the chamber and make it harder for the unit to maintain the required temperature.

Organizing samples by frequency of use and maintaining an up-to-date inventory can reduce unnecessary door openings. For laboratories with frequent access requirements, equipment designed for high-access workflows may also help limit temperature fluctuations.

Inadequate temperature monitoring and alarm systems

Relying solely on a freezer’s built-in temperature display can leave laboratories without sufficient warning of storage problems. The displayed temperature may not represent conditions throughout the entire chamber, and a failure of the freezer’s control or monitoring system may not provide an independent warning.

Effective monitoring generally includes:

  • Continuous temperature monitoring and data logging at an interval appropriate for the equipment, sample type, and risk level, rather than relying only on manual spot checks.
  • Independent temperature probes that are calibrated according to a documented schedule and, where required, traceable to a recognized reference standard.
  • Remote alarm notification systems that alert responsible staff when temperatures move outside defined limits, including outside normal working hours.
  • Defined excursion thresholds and response protocols specifying when an excursion requires investigation and what actions should be taken to protect affected samples.
  • Regular review of temperature records and alarm systems to confirm that monitoring remains functional and that excursions are identified and addressed promptly.

Placing samples in the wrong freezer zone

Not all areas within a freezer or refrigerator provide the same storage conditions. Temperature differences can occur between locations in the chamber, particularly when airflow is restricted or when the unit is frequently opened.

Frost-free refrigerators and freezers use automatic defrost cycles to prevent ice buildup. These cycles can cause temporary temperature fluctuations, which may be unsuitable for certain temperature-sensitive samples. Laboratory-grade units designed for stable storage conditions may use different defrost systems, including manual defrost, depending on the equipment and application.

A frequent mistake is storing temperature-sensitive reagents, particularly enzymes and antibody conjugates, in a general-purpose frost-free unit intended for consumer or office use rather than a laboratory-grade unit designed for the required storage conditions.

The appropriate equipment depends on the sample type, required temperature, and intended use. Laboratories should follow the manufacturer’s recommendations and the validated storage requirements for each sample.

Failing to plan for power outages and backup systems

Power interruptions can put stored samples at risk, particularly when freezers or refrigerators cannot maintain their required temperature for an extended period. Many laboratories only discover gaps in their backup planning when an outage occurs.

Common oversights include:

  • No backup generator or uninterruptible power supply suitable for the equipment and its electrical requirements.
  • No contingency plan for transferring samples to alternative storage during an extended outage.
  • No suitable backup storage capacity, such as an additional freezer or an appropriate cryogenic storage solution, when required.
  • Lack of a documented decision tree specifying which samples receive priority if backup capacity is limited.
  • No defined procedures for monitoring temperatures and assessing sample integrity after an outage.

The appropriate backup solution depends on the equipment, sample type, storage temperature, and expected duration of the interruption. Laboratories should establish contingency plans in advance and review them regularly.

Mislabeling and inventory mismanagement

Storage failures are not always thermal. Illegible or non-standardized labeling, inconsistent barcode systems, and undocumented sample relocations can lead to lost or misidentified samples even when temperature control is adequate.

ISO 15189 addresses sample identification and traceability in medical laboratories, including the identification of samples throughout the examination process. Laboratories should therefore maintain clear identification procedures and ensure that sample locations remain traceable.

A related mistake is failing to maintain a digital inventory map showing the exact freezer, shelf, rack, and box position of each sample. Without an accurate inventory, staff may spend more time searching for samples, increasing door-opening frequency and handling risk.

A well-organized inventory helps laboratories locate samples efficiently, reduce unnecessary freezer access, and maintain traceability throughout the storage lifecycle.

Building a practical prevention checklist

Reducing storage-related sample loss comes down to applying a consistent set of good storage practices. Match the storage temperature to the specific sample type rather than relying on a facility-wide default. Aliquot samples when appropriate to limit freeze-thaw exposure, avoid overloading units beyond their recommended capacity, and use independent temperature monitoring with appropriate alarm notifications. Follow the manufacturer’s recommendations for defrosting, and maintain a documented and tested contingency plan for power failures.

None of these measures is complex individually, but together they help maintain stable storage conditions and protect samples throughout long-term storage.

A practical prevention checklist includes:

  • Match storage temperature to the sample type and validated storage requirements.
  • Minimize unnecessary freeze-thaw cycles by using appropriate aliquots.
  • Keep freezers and refrigerators within the manufacturer’s recommended loading capacity.
  • Organize samples to allow adequate airflow and minimize unnecessary door openings.
  • Monitor temperatures continuously using an appropriate independent monitoring system.
  • Set up alarms and response procedures for temperature excursions.
  • Follow appropriate defrosting and maintenance procedures.
  • Maintain an accurate sample inventory and ensure sample locations remain traceable.
  • Establish and regularly test a contingency plan for power failures and equipment breakdowns.

Consistent storage practices can help preserve sample integrity, reduce the risk of sample loss, and support reliable analytical results over the lifetime of a sample archive.

Our solutions

Explore our freezers here

Explore our refrigerators here

The post Mistakes when storing samples in freezers and refrigerators appeared first on LabSPX.

]]>
https://labspx.com/mistakes-when-storing-laboratory-samples-in-freezers-and-refrigerators/feed/ 0
What is a freeze dryer and how does it work? https://labspx.com/what-is-a-freeze-dryer-and-how-does-it-work/ https://labspx.com/what-is-a-freeze-dryer-and-how-does-it-work/#respond Thu, 28 May 2026 12:13:13 +0000 https://labspx.com/?p=3672 A freeze dryer, also known as a lyophilizer, is a laboratory instrument used to remove liquid from a sample through a low-temperature dehydration process called lyophilization. Instead of using heat like traditional drying methods, freeze drying works by freezing the sample and then reducing the surrounding pressure. This allows the frozen solvent (typically water) to […]

The post What is a freeze dryer and how does it work? appeared first on LabSPX.

]]>

A freeze dryer, also known as a lyophilizer, is a laboratory instrument used to remove liquid from a sample through a low-temperature dehydration process called lyophilization.

Instead of using heat like traditional drying methods, freeze drying works by freezing the sample and then reducing the surrounding pressure. This allows the frozen solvent (typically water) to sublimate directly from solid to vapor, bypassing the liquid phase.

This is why freeze-dried samples retain their original structure, shape, and composition far better than heat-dried materials.

Why not just heat?

Traditional drying methods rely on elevated temperatures, which introduces a range of problems:

  • Shrinkage and structural deformation
  • Loss of volatile or sensitive compounds
  • Degradation of proteins, enzymes, and other biomolecules
  • Changes in colour, flavour, and biological activity

Freeze drying avoids all of this by removing only the solvent while leaving the structural matrix intact. The dried material typically retains its original size and shape, its chemical composition, its biological activity, and, in food or biological samples, its flavor and color. This makes the technique indispensable for sensitive or high-value materials.

Why is freeze drying important in laboratory applications?

Freeze drying is widely used across scientific disciplines because it enables long-term preservation without compromising sample integrity.

Common applications include:

  • Pharmaceuticals (e.g. drug formulations, vaccines)
  • Biotechnology (proteins, enzymes, cells)
  • Environmental samples
  • Food and nutraceutical research

By removing moisture, freeze drying significantly reduces degradation pathways such as hydrolysis and microbial growth. This allows samples to be stored at ambient conditions for extended periods.

How do you determine the right collector temperature?

The collector (or condenser) captures vapor during sublimation. Its temperature must be sufficiently low to trap the solvent effectively.

General rule:

  • The collector temperature should be 15 °C to 20 °C lower than the freezing point of the sample

Typical guidelines:

  • Aqueous samples: approximately -50 °C
  • Aqueous/solvent mixtures: approximately -84 °C
  • Aqueous/methanol mixtures: approximately -105 °C

If the collector is too warm, vapor will not condense properly, leading to inefficient drying and potential contamination of the vacuum system.

How do you calculate the required collector size of a freeze dryer?

Collector capacity must match the total solvent volume removed during a run.

Simple rule:

  • Total sample volume × 2

The factor of two accounts for volume expansion during freezing and ensures sufficient capacity for vapor capture.

Example:

  • 25 samples × 40 mL = 1.0 L
  • 1.0 L × 2 = 2.0 L collector capacity required

Undersizing the collector can lead to incomplete drying or system overload.

Which collector material should you choose?

Material compatibility is often overlooked but critical for system longevity.

  • Standard collectors are made from stainless steel
  • For corrosive or aggressive solvents, a PTFE-coated collector is recommended

This protects the condenser from chemical damage and reduces maintenance requirements.

What types of freeze dryers are available?

Benchtop freeze dryers

Benchtop units are compact systems designed for flexibility and ease of use.

They are ideal for:

  • Academic laboratories
  • Multi-user environments
  • Small to medium sample volumes

A key feature is the valve-based configuration. Each sample flask is connected to an individual valve, allowing users to run or stop samples independently without affecting others. This is particularly useful in shared lab environments.

Console freeze dryers

Console systems are larger, floor-standing units designed for higher throughput.

They typically offer:

  • Larger condenser capacity
  • Integrated space for a vacuum pump
  • Mobility (often mounted on wheels)

These systems are well suited for labs processing larger batches or requiring more robust performance.

All-in-one freeze drying systems

All-in-one systems integrate freezing, drying, and control into a single platform.

Key capabilities:

  • Pre-freezing directly on temperature-controlled shelves (down to approximately -75 °C)
  • Programmable shelf temperature during drying (-55 °C to 50 °C)
  • Integrated collector reaching approximately -84 °C
  • Built-in pneumatic vial stoppering (no external compressed gas required)
  • Multiple valves for flask drying
  • Inert gas backfill for controlled environments

These systems are designed for advanced applications where reproducibility, automation, and process control are critical.

Let's get in touch

FAQ

What is a freeze dryer and how does it work?

A freeze dryer, or lyophilizer, removes liquid from a sample by freezing it and then lowering the pressure so the solvent sublimates directly from solid to vapor. This process avoids the liquid phase, preserving the sample’s structure and composition.

Freeze drying avoids the damage caused by heat drying, such as shrinkage, loss of volatile compounds, and degradation of proteins or enzymes. By removing only the solvent, it preserves structure, biological activity, and chemical composition.

During sublimation, frozen solvent (typically water) transitions directly from solid to vapor without becoming liquid. This occurs under reduced pressure and low temperature, which helps preserve the integrity of sensitive materials.

Freeze drying maintains structure because water is removed without melting. Since the solid matrix is not exposed to liquid flow or high temperatures, the sample keeps its original shape, size, and internal structure.

Freeze drying is critical for long‑term preservation because it removes moisture that drives degradation processes like hydrolysis and microbial growth. This allows sensitive samples to be stored for extended periods under stable conditions.

Freeze drying is widely used for pharmaceuticals such as vaccines, biotechnology samples like proteins and enzymes, environmental samples, and food or nutraceutical products that require preservation without damage.

All‑in‑one systems combine pre‑freezing, drying, and process control. They allow precise temperature programming, integrated vacuum control, vial stoppering, and reproducible workflows for advanced applications.

The post What is a freeze dryer and how does it work? appeared first on LabSPX.

]]>
https://labspx.com/what-is-a-freeze-dryer-and-how-does-it-work/feed/ 0
How to clean a laboratory balance? https://labspx.com/how-to-clean-a-laboratory-balance/ https://labspx.com/how-to-clean-a-laboratory-balance/#respond Tue, 12 May 2026 09:39:01 +0000 https://labspx.com/?p=3595 Keeping a laboratory balance clean is essential for reliable weighing results and safe daily operation. Regular cleaning not only supports measurement accuracy, but also helps extend the lifespan of the instrument and reduce contamination risks in the lab. Why is it important to clean a laboratory balance? Residue, dust, or spilled material can affect weighing […]

The post How to clean a laboratory balance? appeared first on LabSPX.

]]>

Keeping a laboratory balance clean is essential for reliable weighing results and safe daily operation. Regular cleaning not only supports measurement accuracy, but also helps extend the lifespan of the instrument and reduce contamination risks in the lab.

Why is it important to clean a laboratory balance?

Residue, dust, or spilled material can affect weighing accuracy and interfere with reliable measurements. Routine cleaning helps to:

  • Ensure accurate weighing results, particularly when working with analytical and microbalances where small amounts of contamination can affect measurements
  • Extend the life of the weighing equipment
  • Improve user safety, particularly when handling hazardous, corrosive, or reactive substances
  • Reduce the risk of cross-contamination between samples 

Regular cleaning therefore supports accurate measurements, safe operation, and reliable day-to-day use of the laboratory balance.

When should you clean a laboratory balance?

Cleaning frequency depends on the application, the substance being weighed, and how frequently the balance is used. As a general guideline, clean the balance immediately after each use and whenever the weighing substance changes. This helps prevent cross-contamination and reduces exposure risks for the next user.

Balances used to measure very small quantities may require more frequent cleaning because small amounts of contamination can have a greater effect on the measurement.

Laboratories should follow their own SOPs and cleaning procedures where these exist, as cleaning requirements can vary depending on the application and substances handled.

8 easy steps to clean your balance

Step 1: Prepare before cleaning

Before cleaning, make sure you understand the procedure for the specific balance model. Wear appropriate personal protective equipment, such as a lab coat, safety goggles, and gloves suited to the substance being handled.

Consult the operating instructions to check how removable parts should be disassembled and reassembled, and which cleaning agents and methods are recommended. Using an unsuitable cleaning method or cleaning agent can damage the balance or its components.

Step 2: Switch off the balance display

Turn off the balance display before cleaning.

Unplugging the balance is recommended, although not always necessary. If possible:

  • Leave the balance in its normal operating position
  • Avoid tilting the instrument sideways
  • Do not disconnect connected peripherals unnecessarily

This helps protect the instrument during the cleaning process.

Step 3: Clean the area around the balance

Clean the workspace around the balance regularly to help prevent dust and other contaminants from reaching the weighing area.

A daily cleaning routine can include:

  • A soft-bristle brush for loose dust and particles
  • A damp ChemWipe or paper towel for the surrounding work surface

Keeping the surrounding area clean helps reduce contamination of the balance between routine cleanings.

Step 4: Remove all removable parts

Disassemble the removable components before cleaning to make all surfaces easier to reach. These typically include:

  • Inner draft shield
  • Weighing pan
  • Sub pan
  • Pan stem
  • Draft ring
  • Drip tray

On A&D Weighing balances, these components can be removed without unlocking or unscrewing them. Take care when removing the parts so they can be correctly positioned during reassembly.

Which cleaning agents should be used to clean a laboratory balance?

The cleaning agent should effectively remove contamination without damaging the balance or its components. Always check the manufacturer’s operating instructions to confirm which cleaning agents and methods are suitable for the specific balance.

Contamination typeRecommended cleaning methodPrecautions
Powder or dustDisposable tissue or soft-bristled brushDo not use compressed air or blow on the balance
General residueLint-free cloth moistened with a suitable cleaning agent or deionized waterCheck the manufacturer’s recommendations before using solvents on coated or plastic surfaces
Sticky or oily substancesDamp lint-free cloth with a suitable mild cleaning agentAvoid abrasive cleaning materials
Biological or chemical contaminationA suitable detergent or laboratory-approved disinfectantCheck compatibility with the balance materials before use

Static electricity can also affect weighing results, particularly when using microbalances and semi-micro balances. Cleaning plastic draft shields can generate static charges, so an antistatic cloth or ionizing device can be used where static is a recurring issue.

Step 5: Clean the balance carefully

Use a lint-free cloth moistened with a mild cleaning agent to remove spills and residue from the balance surface.

For specific types of contamination:

  • Powder or dust: use a disposable tissue or soft bristled brush
  • Sticky substances: use a damp lint-free cloth with a mild solvent or peanut butter

Avoid abrasive cleaning materials.

Important cleaning precautions:

  • Never blow on the equipment, as this can push contamination inside the balance
  • Wipe away from the hole in the middle of the balance
  • Do not allow substances to enter internal components
  • Never spray or pour liquids directly onto the balance

Step 6: Clean the removable parts

Clean the removable parts with a damp cloth or tissue and a suitable cleaning agent. Stainless steel components, such as the weighing pan, sub pan, and drip tray, may be cleaned in a dishwasher or autoclave when permitted by the manufacturer’s instructions and required for the application.

Always check the operating instructions before placing any balance components in a dishwasher or autoclave.

Step 7: Reassemble the balance

After cleaning, carefully reassemble the balance and ensure all parts are correctly positioned.

Then:

  • Switch the balance back on
  • Verify that it is functioning correctly

If the balance was completely powered off, allow sufficient warm-up time before use according to the manufacturer’s operating instructions.

Step 8: Verify that the balance is ready for use

Before returning the balance to service, check that the air bubble is centered within the marked circle on the level indicator. Adjust the leveling feet if necessary.

Calibrate the balance using external calibration weights or an internal calibration function, such as Automatic Self Calibration (ASC), depending on the model.

Finally, place a test weight on the pan and perform a routine accuracy check according to the balance’s specified tolerance. Check connected accessories, such as printers, to ensure they are functioning correctly before returning the balance to use.

Let's get in touch

FAQ

Why is cleaning a laboratory balance important?

Cleaning a laboratory balance is essential to maintain weighing accuracy, user safety, and instrument longevity. Even small amounts of residue or spilled material can affect weighing performance and increase the risk of cross‑contamination over time.

Residues, powders, or sticky substances can interfere with the weighing mechanism and airflow around the pan. Over time, this can lead to unstable readings, drift, or inaccurate results, especially in precision and analytical balances.

Cleaning directly after use prevents residues from drying or becoming harder to remove. It also minimizes exposure risks for users and helps maintain a clean weighing environment.

Dust and contamination in the surrounding workspace can easily reach the balance during weighing. Keeping the area clean reduces the risk of contaminants being transferred back onto the balance.

Cleaning agents should completely remove contamination without damaging the balance. Only mild cleaning agents recommended in the manufacturer’s operating manual should be used to protect sensitive materials and finishes.

Spraying or pouring liquids directly onto a balance may allow moisture to enter internal components. This can cause corrosion, electronic damage, or long‑term measurement instability.

Blowing air can push contamination deeper into the balance housing or internal mechanisms. This increases the risk of internal buildup and future accuracy problems.

The post How to clean a laboratory balance? appeared first on LabSPX.

]]>
https://labspx.com/how-to-clean-a-laboratory-balance/feed/ 0
Common mistakes when using a laboratory incubator https://labspx.com/common-mistakes-when-using-a-laboratory-incubator/ https://labspx.com/common-mistakes-when-using-a-laboratory-incubator/#respond Wed, 22 Apr 2026 11:22:58 +0000 https://labspx.com/?p=3508 A laboratory incubator is designed to provide a stable environment for samples, cultures, and biological processes, but small setup or handling mistakes can quickly affect results. The good news is that most incubator problems are preventable with good habits, routine checks, and a clear cleaning and maintenance schedule. Setting the wrong temperatureEven small deviations can […]

The post Common mistakes when using a laboratory incubator appeared first on LabSPX.

]]>

A laboratory incubator is designed to provide a stable environment for samples, cultures, and biological processes, but small setup or handling mistakes can quickly affect results. The good news is that most incubator problems are preventable with good habits, routine checks, and a clear cleaning and maintenance schedule.

Setting the wrong temperature
Even small deviations can affect growth, viability, or test results
Read more
Opening the door too often
Each time the incubator door opens, temperature, humidity, and gas levels can fluctuate
Read more
Overloading the chamber
An overcrowded incubator can block airflow and create uneven temperature distribution, which may lead to hot and cold spots inside the chamber
Read more
Using the wrong incubator for the task
Different organisms and workflows may require different temperatures, humidity control, or gas composition
Read more
Letting contamination build up
Contamination is a major risk in incubators, especially when spills, open containers, or poor cleaning practices are involved
Read more
Using the wrong cleaning products
Some disinfectants and detergents can damage incubator components or interfere with cell culture applications
Read more
Ignoring maintenance and calibration
Even a well-designed incubator can drift out of spec if routine maintenance is skipped
Read more
Storing samples carelessly
Poor organization can lead to blocked airflow, longer door-open times, and accidental mix-ups between samples
Read more

Setting the wrong temperature

Incorrect temperature settings are one of the most common incubator mistakes. Even small deviations can affect growth, viability, or test results. In many biological applications, deviations of around ±0.5 to ±1°C can already influence sensitive cultures. Some incubators also drift over time, so the display may not match the real internal temperature.

How to avoid it:

  • Calibrate the incubator regularly against a certified reference thermometer or data logger
  • Verify the chamber temperature before placing important samples inside
  • Check the manufacturer’s recommended temperature range for each application

Opening the door too often

Each time the incubator door opens, temperature, humidity, and gas levels can fluctuate. Frequent door openings also increase the chance of contamination and make it harder to maintain consistent conditions.

How to avoid it:

  • Plan sample handling so you open the door as few times as possible
  • Group tasks together instead of checking cultures one by one
  • Use viewing panels or monitoring tools when available

Overloading the chamber

An overcrowded incubator can block airflow and create uneven temperature distribution, which may lead to hot and cold spots inside the chamber. Overloading also makes it harder to keep items organized and can increase the risk of accidental contamination.

How to avoid it:

  • Leave space between containers so air can circulate freely
  • Do not exceed the manufacturer’s load recommendations
  • Arrange samples so they are easy to access without reshuffling the whole chamber

Using the wrong incubator for the task

Not all incubators are suitable for every sample type. Different organisms and workflows may require different temperatures, humidity control, or gas composition (for example CO₂ levels in cell culture incubators typically around 5%).

How to avoid it:

  • Match the incubator type to the application, such as microbiology, cell culture, or specialized atmospheric control
  • Label samples clearly with their required incubation conditions
  • Keep separate incubators or dedicated shelves for different workflows when possible

Letting contamination build up

Contamination is a major risk in incubators, especially when spills, open containers, or poor cleaning practices are involved. Dirty surfaces, handles, and shelves can transfer microbes back into fresh samples.

How to avoid it:

  • Clean the interior and surrounding surfaces on a routine schedule
  • Wipe spills immediately and disinfect after any suspected contamination
  • Use clean gloves and avoid placing unsealed items in the chamber

Using the wrong cleaning products

Some disinfectants and detergents can damage incubator components or interfere with cell culture applications. Harsh chemicals may leave residues that affect future samples or corrode internal surfaces.

How to avoid it:

  • Follow the manufacturer’s cleaning instructions for the exact incubator model
  • Avoid chemicals that are not approved for incubator use
  • Rinse and dry surfaces properly after cleaning so no residue remains

Ignoring maintenance and calibration

Even a well-designed incubator can drift out of spec if routine maintenance is skipped. Faulty sensors, worn seals, airflow issues, and filter problems can all reduce performance over time.

How to avoid it:

  • Schedule regular calibration and document the results
  • Inspect door seals, filters, and internal components as part of routine maintenance
  • Follow a preventative maintenance plan instead of waiting for a failure

Storing samples carelessly

Poor organization can lead to blocked airflow, longer door-open times, and accidental mix-ups between samples. It also makes it easier to misplace containers or confuse incubation conditions.

How to avoid it:

  • Organize samples by type, date, and required conditions
  • Use shelves and racks consistently to keep airflow clear
  • Keep a clear chamber layout so items can be found quickly

Practical checklist

Before using a laboratory incubator, check these basics:

  • Temperature is calibrated and stable
  • The chamber is clean and dry
  • Samples are properly labelled and sealed
  • Airflow is not blocked
  • Door seals are intact
  • Cleaning and maintenance records are up to date

Why this matters

Incubator mistakes can lead to contaminated samples, inaccurate results, wasted materials, and unnecessary downtime. A simple routine of cleaning, calibration, careful loading, and correct sample handling goes a long way toward reliable performance.

For labs that depend on consistency, incubator discipline is part of good science, not just equipment care.

Summary

Common mistake

Why it matters

How to avoid it

Setting the wrong temperature

Small temperature deviations (±0.5–1 °C) can affect growth, viability, and test results

Calibrate regularly using a certified reference, verify temperature before use, follow application‑specific recommendations

Opening the door too often

Causes fluctuations in temperature, humidity, and gas levels; increases contamination risk

Plan tasks efficiently, group sample handling, use viewing windows or monitoring tools

Overloading the chamber

Blocks airflow and creates uneven temperature zones

Leave space between samples, respect load limits, organize for easy access

Using the wrong incubator type

Incorrect temperature, humidity, or gas control can compromise samples

Match incubator type to application, label sample requirements, separate workflows when possible

Allowing contamination to build up

Microbial contamination can spread to clean samples

Clean surfaces routinely, wipe spills immediately, use sealed containers and clean gloves

Using incorrect cleaning products

Harsh chemicals can damage components or leave harmful residues

Follow manufacturer cleaning guidelines, use approved agents only, rinse and dry thoroughly

Skipping maintenance and calibration

Sensor drift, worn seals, or airflow issues reduce performance

Schedule regular calibration, inspect components, follow a preventive maintenance plan

Poor sample organization

Leads to blocked airflow, longer door-open times, and sample mix-ups

Organize by type and date, use racks consistently, keep a clear chamber layout

Let's get in touch

FAQ

Why does incorrect temperature setting matter in a laboratory incubator?

Even small temperature deviations can significantly affect biological outcomes. In many cell culture and microbiology workflows, variations as small as ±0.5 to ±1 °C can alter growth rates, viability, and experimental reproducibility. Temperature drift between the display and actual chamber conditions is a known issue, which is why regular calibration against a certified reference thermometer or data logger is considered best practice in regulated laboratories (ISO/IEC 17025; WHO Laboratory Biosafety Manual).

Overloading blocks airflow and disrupts uniform heat distribution, leading to hot and cold zones within the chamber. Uneven temperature exposure can compromise sample consistency and reproducibility. Manufacturers and biosafety guidelines consistently recommend keeping space between containers to allow unrestricted air circulation and accurate temperature control.

Different applications require different environmental controls. For example, mammalian cell culture typically requires ~37 °C with around 5 % CO₂, while microbiological incubations may only need controlled temperature. Using the wrong incubator can expose samples to unsuitable humidity or gas conditions, negatively affecting growth and experimental validity. Dedicated incubators or clearly separated workflows reduce this risk (CDC BMBL).

Harsh disinfectants or unapproved detergents can damage sensitive components, degrade seals, and leave residues that interfere with cell culture or microbiological assays. Manufacturer‑approved cleaning agents are validated to balance effective disinfection with material compatibility, aligning with equipment qualification and good laboratory practice (GLP) principles.

Disorganized storage increases door‑open time, blocks airflow, and raises the likelihood of sample mix‑ups or cross‑contamination. Clear labeling, consistent rack use, and a defined chamber layout support faster access, stable conditions, and traceability, key principles of good laboratory practice.

The post Common mistakes when using a laboratory incubator appeared first on LabSPX.

]]>
https://labspx.com/common-mistakes-when-using-a-laboratory-incubator/feed/ 0
Sterilization based on your load type https://labspx.com/sterilization-based-on-your-load-type/ https://labspx.com/sterilization-based-on-your-load-type/#respond Thu, 29 Jan 2026 12:50:44 +0000 https://labspx.com/?p=2860 Which sterilization method fits your load type? Choosing the right sterilization process starts with understanding your load type. Laboratory waste, liquids, glassware, porous materials, and high-risk biological loads all behave differently during sterilization, and therefore require specific cycles, temperatures, and handling methods. This guide covers the most common load types and what to consider for […]

The post Sterilization based on your load type appeared first on LabSPX.

]]>

Which sterilization method fits your load type?

Choosing the right sterilization process starts with understanding your load type. Laboratory waste, liquids, glassware, porous materials, and high-risk biological loads all behave differently during sterilization, and therefore require specific cycles, temperatures, and handling methods. This guide covers the most common load types and what to consider for each.

Liquids
Solutions or chemicals used in laboratory environments, such as growth media
Read more
Waste
Microbiological laboratory waste, clinical samples such as blood, tissue, and other biological materials
Read more
Glassware
Conical and volumetric flasks, beakers, test tubes, graduated cylinders, watch glasses, and similar items
Read more
Porous loads
Gowns, instrument packs, and other reusable items
Read more
Hazardous waste
Harmful human pathogens, viruses, and bacteria that pose serious health and safety risks
Read more

Liquids

What is a fluid load?

Fluid or liquid loads typically consist of solutions or chemicals used in laboratory environments, such as growth media. They can include any non-solid material that requires sterilization. Growth or culture media may be solid, liquid, or semi-solid and are designed to support the growth of microorganisms or cells under controlled conditions. Different media are used for different cell types and must be sterilized before use, usually in an autoclave.

What are the sterilization parameters for fluid loads? 

Many media are sterilized at 121°C, with the required exposure time depending on factors such as the volume and container geometry. Larger volumes generally require longer exposure to reach the required temperature throughout the liquid. Autoclaves used for media sterilization should therefore support different cycle parameters and controlled exhaust or cooling phases to reduce the risk of boil-over during depressurization.

What type of fluid discard require sterilization?

Fluid discard loads include waste liquids that require sterilization before disposal. Common examples include:

  • Used or expired culture media (such as nutrient broth)
  • Reagents
  • Liquid specimens
  • Cleaning solutions
  • Biological waste

How are sealed fluids sterilized?

Some fluid loads require sterilization in sealed containers. In these cases, air removal by air purging or freesteaming may be sufficient, depending on the load and autoclave cycle. Prolonged freesteaming is generally unnecessary. Higher temperatures than 121°C may also be used to shorten sterilization times, while controlled cooling helps prevent problems caused by rapid depressurization.

Waste

What is a mixed discard load?

A mixed discard load consists of contaminated materials of different types and forms that must be sterilized before disposal. This can include microbiological laboratory waste as well as clinical materials such as blood, tissue, and other biological waste. Because these loads contain a variety of materials, they can present challenges for effective steam penetration.

Typical mixed discard loads may contain a combination of items, including:

  • Plastic bags
  • Containers
  • Fabrics
  • Gloves
  • Paper towels
  • Pipettes
  • Culture plates

Why is sterilizing mixed discard loads tricky?

The main challenge with mixed discard loads is the presence of small pockets of trapped air, which can prevent effective steam penetration. These loads are often placed in plastic bags that may include containers that can melt or collapse before sterilization is complete, further increasing the risk of air pockets.

For this reason, an advanced vacuum system is recommended to improve air removal. It is also essential not to overfill the autoclave chamber, as overloading can prevent consistent steam penetration.

What is multi-point validation and why 12 points?

Multi-point (12-pen) validation uses 12 calibrated thermocouple probes distributed through the load during a heat distribution study. The probes are positioned at different locations within the load to identify areas where the required sterilization conditions may be more difficult to achieve.

Using multiple measurement points helps verify that the required temperature is reached throughout the load and can help identify potential cold spots. The exact validation procedure depends on the autoclave and load configuration.

For high-risk waste, autoclave options compliant with Category III (BSL-3) requirements are available, including HEPA filtration and vacuum systems. Using dedicated discard containers is also advised to contain spills and keep the autoclave chamber clean.

Glassware

Which glassware can be autoclaved?

Autoclaving scientific glassware ensures effective surface sterilization.

A wide range of glass items are routinely sterilized in laboratory environments, including:

  • Conical and volumetric flasks,
  • Beakers
  • Test tubes
  • Graduated cylinders
  • Watch glasses

Borosilicate or quartz glassware is generally recommended, as these materials are better able to withstand the high temperatures and pressures encountered during autoclave cycles.

What are unwrapped instruments?

Unwrapped instruments typically include items used in medical, dental, veterinary, beauty, and ophthalmic procedures, as well as selected laboratory equipment. In some cases, larger items such as laboratory apparatus or metal cages must also be sterilized and are usually processed as unwrapped instruments.

What are the challenges of sterilizing glassware and unwrapped instruments?

Sterilizing glassware requires careful handling to prevent breakage or shattering. Empty glassware should never be sealed when using high-vacuum drying, and proper loading and unloading practices are essential to avoid damage, overcrowding, or scalding risk.

Post-cycle drying is beneficial for all instrument loads. Unwrapped instruments are dried by heating the surrounding air, while glassware may require specialized drying procedures. For small benchtop units, post-vacuum systems improve drying efficiency; larger units should use a jacketed pressure vessel for optimal results.

Porous loads

What types of porous loads can be sterilized in an autoclave?

Autoclaves can sterilize a wide variety of fabrics and textiles. In hospitals, this commonly includes gowns, instrument packs, and other reusable items. Veterinary practices may use autoclaves for animal bedding and instruments.

Central Sterile Service Departments (CSSDs) typically use a combination of pouches and wrapping depending on the size and type of instruments. Small instruments are usually placed in pouches, while larger items such as trays and pans are wrapped. Surgical packs and wraps are commonly sealed with autoclave tape, which changes color when the correct sterilization temperature is reached, confirming successful sterilization. Standard masking tape cannot withstand autoclave conditions and should never be used as a substitute.

Hazardous waste

What makes BSL-3 waste sterilization different?

Biosafety Level 3 (BSL-3) facilities handle highly regulated work with harmful human pathogens, viruses, and bacteria that pose serious health and safety risks. Examples of microbes handled in BSL-3 laboratories include Clostridium botulinum (botulism), yellow fever virus, and Mycobacterium tuberculosis.

Waste from these environments must be effectively sterilized before disposal. In some cases, a double-door or pass-through autoclave is used, with the loading side separated from the unloading side by a containment wall. This configuration helps prevent sterilized material from being recontaminated when it is removed from the autoclave.

What HEPA filtration is used for BSL-3 autoclaves?

BSL-3 autoclave systems can incorporate HEPA filtration and other containment features to help prevent potentially harmful biological material from being released from the system. The specific filtration requirements depend on the facility, autoclave design, and applicable containment requirements.

BSL-3 facilities may also require effluent retention systems and bacteriological HEPA filters on exhausts to help prevent harmful pathogens from being released into the environment.

Why is sterilizing prions and other resistant microbes challenging?

Most microorganisms are killed above 80 °C, but some require higher temperatures and longer exposure times. Prions are a notable example because they are considerably more resistant to conventional sterilization processes.

Prion-contaminated materials therefore require specialized sterilization procedures, which may involve extended autoclave cycles and, depending on the application and applicable guidance, chemical pretreatment. The appropriate procedure should always be determined according to the relevant biosafety and sterilization requirements.

A heated jacket is often used in hazardous waste applications to support even temperature distribution throughout the chamber. Custom cycle settings may be necessary to ensure that hazardous material is thoroughly and safely sterilized.

Key takeaways

Matching your load type to the right autoclave cycle

Different load types require fundamentally different sterilization approaches:

  • Liquid loads require controlled temperatures, appropriate cycle parameters, and short cooling times to preserve product quality.
  • Mixed discard loads benefit from advanced vacuum systems, dedicated containers, and multi-point validation to ensure steam penetration.
  • Glassware and unwrapped instruments need careful loading practices and post-cycle drying suited to the material type.
  • Porous loads such as fabrics and instrument packs require proper wrapping and validated autoclave tape.
  • High-risk and BSL-3 waste demands specialized equipment including pass-through autoclaves, HEPA filtration, and custom cycle settings.

Understanding your load type is the foundation of an effective, safe sterilization process, and the starting point for selecting the right autoclave configuration.

Load typeTypical temperatureTypical timeKey equipment feature
Liquids121°C15 to 30 minSlow exhaust, controlled cooling
Mixed discard121 to 134°CVaries by loadAdvanced vacuum, 12-point validation
Unwrapped instruments (IUSS)132 to 135°C3 to 10 minDirect steam contact, no packaging
Porous loads121 to 134°CPer wrap typeValidated autoclave tape
BSL-3 waste121 to 134°CUp to 1 hrPass-through design, HEPA ≥99.97% at 0.3 µm
Prion-contaminated121 to 134°C18 min to 1 hrChemical pretreatment, extended cycle

Let's get in touch

FAQ

What is a fluid load?

A fluid load consists of liquids used in laboratory environments, such as growth media, solutions, or chemicals, that require sterilization. Any non‑solid material that must be sterilized before use is considered a fluid load.

Different media types require different temperatures or exposure times. While many are sterilized at 121 °C for 15 minutes, others need different cycle parameters, so autoclaves must support a wide temperature range.

Typical fluid discard includes used culture media, reagents, liquid specimens, cleaning solutions, and biological waste.

Sealed fluids are sterilized using air purging (freesteaming). Prolonged freesteaming is usually unnecessary. Higher temperatures than 121 °C can shorten sterilization times, and cooling should be kept as short as possible to maintain product quality.

Because these loads often contain bags, plastics, and containers that trap air. This prevents effective steam penetration. Items may melt or collapse during the cycle, increasing the risk of air pockets.

Yes. For BSL‑3 applications, autoclaves with HEPA filtration, vacuum systems, or Category III compliance are recommended.

Common autoclaved glassware includes flasks, beakers, test tubes, cylinders, and watch glasses. Borosilicate and quartz glassware are recommended because they tolerate high temperatures and pressure.

Unwrapped instruments dry through heated air. Glassware may require specialized drying or post‑vacuum systems (benchtop units) or jacketed vessels (large autoclaves).

Textiles such as gowns, wraps, bedding, and reusable instrument packs.

Autoclave tape changes color when correct sterilization temperatures are reached. It validates successful processing. Standard masking tape cannot withstand autoclave conditions and must not be used.

Prions require significantly higher temperatures and much longer cycles than standard sterilization. Heated jackets and custom cycle settings are often necessary to ensure complete sterilization.

The post Sterilization based on your load type appeared first on LabSPX.

]]>
https://labspx.com/sterilization-based-on-your-load-type/feed/ 0
How to prevent contamination in the lab https://labspx.com/how-to-prevent-contamination-in-the-lab/ https://labspx.com/how-to-prevent-contamination-in-the-lab/#respond Tue, 16 Dec 2025 10:33:43 +0000 https://labspx.com/?p=2623 How can you prevent contamination in the lab? Even with the best intentions and equipment, lab contamination can sneak in and compromise your workflow. From cross-contamination between samples to airborne particles or human contact, keeping your workspace clean requires constant attention, the right tools, and validated protocols. A single contamination event can invalidate weeks of […]

The post How to prevent contamination in the lab appeared first on LabSPX.

]]>

How can you prevent contamination in the lab?

Even with the best intentions and equipment, lab contamination can sneak in and compromise your workflow. From cross-contamination between samples to airborne particles or human contact, keeping your workspace clean requires constant attention, the right tools, and validated protocols.

A single contamination event can invalidate weeks of work, waste precious samples, and delay critical research timelines. Understanding the different types of contamination, how to detect them, and which controls actually work is the first step toward prevention.

Types of contamination: 

  1. Cross-contamination 
  2. Environmental contamination 
  3. Chemical contamination 
  4. Biological contamination 
  5. Human contamination 

1. What is cross-contamination and how can it be prevented? 

Cross-contamination occurs when unwanted substances from other samples or tools enter your experiment. It is one of the most common forms of contamination and can happen in many ways: using the same pipette tip for multiple samples, inadequate cleaning, or splash-back during transfers.

Risks

Cross-contamination can lead to:

  • False positives
  • Skewed results
  • Compromised reproducibility

How to detect it

Blank samples can be used between batches or runs to help identify potential contamination before it affects experimental results. Periodic checks of shared equipment and work surfaces can also help identify sources of contamination.

Prevention tip

  • Clean and sterilize tools between uses using a method appropriate for the equipment and application
  • Use a fresh pipette tip for every sample
  • Color-code or clearly label equipment for different sample types to prevent accidental mixing
  • Dedicate specific equipment to high-risk applications, such as PCR, where carryover contamination can affect results

2. What is environmental contamination and how can it affect your samples? 

Airborne particles, microbes, and dust can easily land on open materials or surfaces. Every time you open a tube or petri dish, your sample is exposed to contaminants in the air. Temperature fluctuations and humidity can also create conditions favorable for microbial growth.

Risks

Environmental contamination can lead to:

  • Microbial growth
  • Degraded samples
  • Inaccurate measurements

How to detect it

Airborne contamination can be monitored using methods such as particle counters and settle plates, depending on the laboratory environment and application. Regular environmental monitoring can help identify changes in contamination levels and potential sources.

Prevention tips

  • Work in sterile conditions whenever required by the application
  • Use laminar flow cabinets or biosafety cabinets for sensitive work
  • Keep lab doors closed and minimize unnecessary foot traffic
  • Maintain proper HVAC systems with HEPA filtration
  • Clean work surfaces regularly with disinfectants appropriate for the contaminant and application 

3. What is chemical contamination and how can it be prevented? 

Chemical contamination happens when incompatible reagents mix unintentionally. Residual chemicals in glassware, improper storage of reactive compounds, or using the wrong solvent can cause unwanted reactions. Even trace amounts can significantly affect sensitive assays.

Risks 

Chemical contamination can lead to:

  • Altered chemical reactions
  • Hazardous by-products
  • Inaccurate or unreliable results

How to detect it

Blank runs and reagent checks can help identify chemical carryover or contamination before it affects experimental results. For trace-level applications, analytical techniques such as GC-MS or ICP-MS can be used to identify and quantify specific contaminants.

Prevention tips 

  • Rinse glassware thoroughly between uses using a cleaning method appropriate for the application
  • Always label solutions with their content, concentration, and preparation date
  • Store incompatible chemicals separately according tot heir chemical properties 
  • Use dedicated glassware for specific reagents or applications where cross-contamination is a concern
  • Maintain a clear chemical inventory system and monitor reagent shelf life

4. What is biological contamination and how can it be prevented? 

Biological contamination can come from bacteria, fungi, mycoplasma, viruses, and other microorganisms. In cell culture, a single contaminated flask can spread contamination throughout an incubator. Biological contaminants may also produce metabolic byproducts that interfere with experiments even after the contaminating organism has been removed.

Risks 

Biological contamination can lead to:

  • Contaminated cultures
  • Failed experiments
  • Safety hazards

How to detect it

Regular monitoring can help detect biological contamination at an early stage. Cultures should be inspected for changes such as unusual cell morphology, turbidity, or other unexpected changes. Mycoplasma contamination can also be detected using dedicated testing methods, including PCR-based assays.

Prevention tips 

  • Sterilize equipment, media, and other materials using methods appropriate for the application (autoclaving is essential)
  • Use antibiotics in culture media only when necessary, as they can mask some forms of contamination
  • Quarantine and test new cell lines before introducing them to established cultures 
  • Monitor cultures regularly for signs of contamination rather than only when problems are suspected

5. What is human contamination and how does is contribute to lab contamination?

Humans can be a significant source of laboratory contamination. Skin sheds cells and particles, while breathing, talking, coughing, and sneezing can introduce microbes and moisture into the surrounding environment. Direct contact, such as fingerprints on glassware or other equipment, can also interfere with sensitive analyses.

Risks

Human contamination can lead to:

  • Sample degradation
  • Inaccurate readings

Prevention tips 

  • Wear appropriate PPE, including gloves, lab coats, and safety glasses
  • Tie back hair and avoid speaking, coughing, or sneezing over open samples
  • Change gloves after touching non-sterile surfaces
  • Wash hands before and after glove use
  • Consider face masks for sensitive work

Other sources of contamination

Laboratory contamination can also originate from equipment, water, and storage conditions:

  • Equipment: poorly maintained or inadequately cleaned instruments can harbor residues, particles or microorganisms 
  • Water supply: water that does not meet the requirements of the application can introduce ions, particles, or microorganisms into samples and reagents 
  • Storage conditions: inappropriate temperature, humidity, or storage conditions can degrade samples and reagents or promote microbial growth 

What are best practices for a contamination-free lab? 

  • Implement clear cleaning protocols and document cleaning activities
  • Schedule regular equipment maintenance and calibration according to the instrument, application, and laboratory SOPs
  • Train staff on aseptic techniques and contamination awareness
  • Use appropriate contamination controls or indicators for critical processes
  • Audit workflow periodically to identify potential contamination sources and recurring problems

How does contamination occur in the lab?

Laboratory contamination can enter through several pathways, including the air, physical contact, equipment, reagents, water, and biological materials. Airborne particles and microorganisms can settle on open samples and work surfaces, while contact with contaminated gloves, tools, or equipment can transfer residues between samples.

Contamination can also occur when reagents or media are improperly stored, used beyond their recommended shelf life, or handled incorrectly. Biological contamination may spread from a single contaminated culture or inadequately sterilized instrument to shared equipment, incubators, or other samples.

Many contamination events result from small gaps in routine cleaning, handling, storage, or monitoring procedures rather than a single major failure. Consistent procedures, regular monitoring, and good documentation therefore play an important role in preventing contamination.

How can you prevent sample swaps in the laboratory?

Sample swaps typically occur during labeling, transfer, or batch processing, particularly when multiple similar-looking samples are handled in sequence. Clear sample identification and consistent handling procedures can significantly reduce this risk.

Where available, barcode or 2D data matrix labeling linked to a LIMS (laboratory information management system) can reduce manual data entry and improve sample traceability. Other preventive measures include:

  • Process one sample at a time where practical
  • Verify sample identity at each transfer or processing step
  • Use clearly numbered or color-coded racks to keep samples organized
  • Use a second-person verification step for critical sample transfers or irreplaceable samples where required by the laboratory’s procedures
  • Document sample transfers and maintain chain-of-custody records where applicable

These measures make it easier to trace samples throughout the workflow and identify potential mix-ups before they affect final results.

What are the signs of laboratory contamination?

Signs of contamination depend on the type of sample, contaminant, and laboratory application. Some forms of contamination are visible, while others become apparent through changes in analytical results or routine quality controls.

Common signs include:

  • Unexpected turbidity, discoloration, or gas formation in samples or cultures
  • Unusual peaks, signals, or baseline changes in analytical measurements
  • Results that fall outside expected ranges or show reduced reproducibility between replicates
  • Changes in pH, cell morphology, or growth rate in cell cultures
  • Unexpected results in blank samples or controls
  • Unexplained changes in equipment performance or measurement stability

Regular blank testing, controls, and routine monitoring can help identify contamination before it affects a larger batch of samples or experiments.

How can we help?

FAQ

What causes most contamination events in the lab?

Contamination can come from many sources, including cross‑contamination between samples, airborne particles, chemical residues, biological agents, or even human contact. Even a single contamination event can invalidate experiments and waste valuable materials, making prevention essential.

Cross‑contamination happens when material from one sample unintentionally gets into another. This often occurs through reused pipette tips, unclean tools, or accidental splashing. To prevent it, use fresh pipette tips for every sample, clean tools between uses, and consider color‑coding equipment to separate workflows

Environmental contamination comes from airborne dust, microbes, and particles that enter open tubes, plates, or instruments. Temperature and humidity shifts may also promote microbial growth. Working in sterile environments, using biosafety or laminar flow cabinets, cleaning surfaces regularly, and maintaining proper HVAC systems helps prevent environmental exposure.

Chemical contamination occurs when incompatible reagents mix unintentionally. This often results from poorly washed glassware, mislabeling, or incorrect storage. Prevention relies on thorough rinsing of equipment, clear labeling, separate storage for incompatible chemicals, and maintaining an organized inventory system.

Biological contamination comes from bacteria, fungi, or viruses that enter cultures, reagents, or samples. It can spread quickly, especially in cell culture environments. Sterilizing equipment, autoclaving media, quarantining new cell lines, and monitoring cultures regularly are essential to avoid biological contamination.

Humans constantly shed skin cells, release microbes through breathing, and leave residues like oils or fingerprints on surfaces. To minimize this, wear appropriate PPE, tie back hair, avoid talking over open samples, change gloves regularly, and wash hands before and after glove use.

Implementing strict cleaning routines, maintaining equipment on schedule, training staff in aseptic technique, using contamination indicators, and auditing workflows regularly are key. These practices create a structured environment where contamination risks are consistently minimized.

The post How to prevent contamination in the lab appeared first on LabSPX.

]]>
https://labspx.com/how-to-prevent-contamination-in-the-lab/feed/ 0
How to achieve accurate weighing in your lab https://labspx.com/how-to-achieve-accurate-weighing-in-your-lab/ https://labspx.com/how-to-achieve-accurate-weighing-in-your-lab/#respond Tue, 16 Dec 2025 10:33:00 +0000 https://labspx.com/?p=2575 How to achieve accurate weighing in your lab Accurate and precise weighing is essential in almost every lab process. While advanced balances and software help, the right equipment alone isn’t enough. Proper weighing depends on two key factors: Choosing the right location for your balance Operating the balance correctly Let’s explore how to create the […]

The post How to achieve accurate weighing in your lab appeared first on LabSPX.

]]>
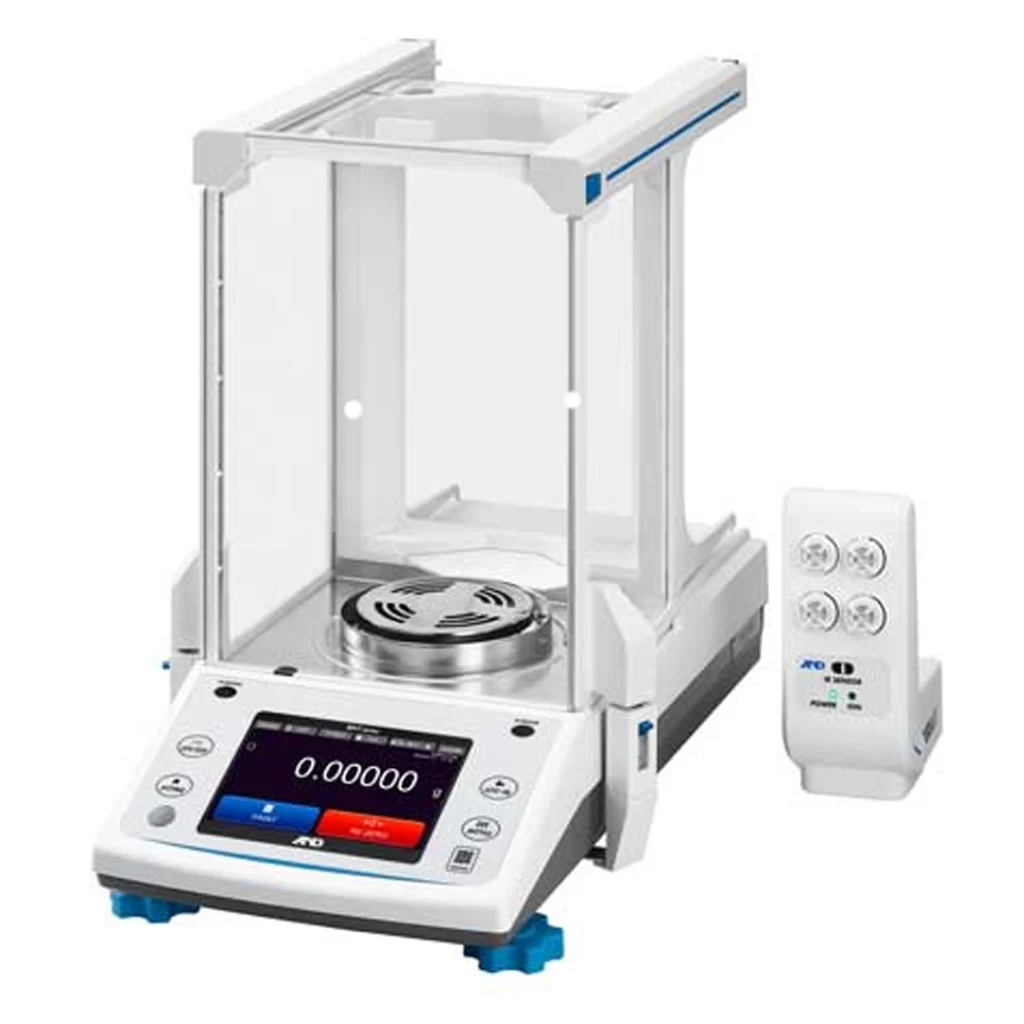
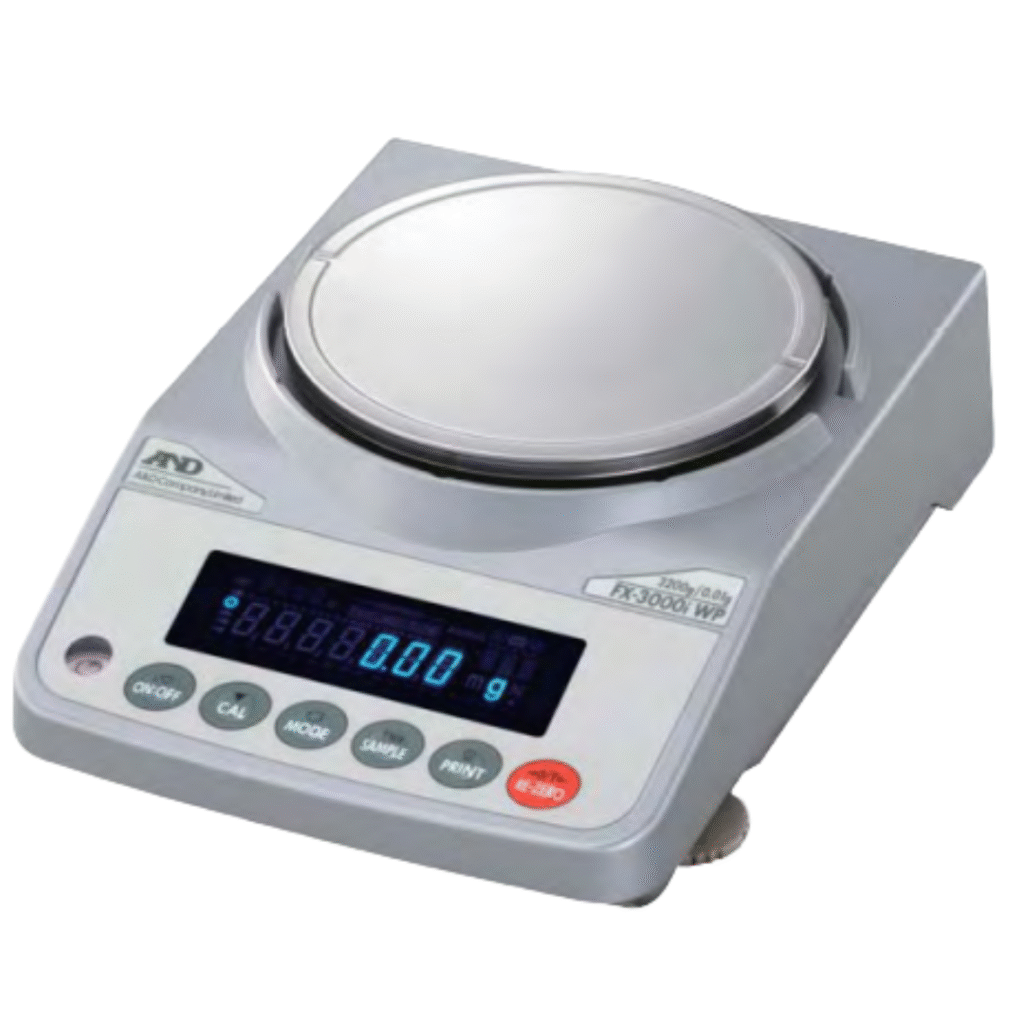
How to achieve accurate weighing in your lab

Accurate and precise weighing is essential in almost every lab process. While advanced balances and software help, the right equipment alone isn’t enough. Proper weighing depends on two key factors:

  • Choosing the right location for your balance
  • Operating the balance correctly

Let’s explore how to create the ideal weighing environment and avoid common errors.

How can I create the ideal weighing environment for my balance? 

Room conditions matter

  • Place the balance in a vibration-free room, away from drafts and electrostatic charges.
  • Maintain a stable temperature; avoid locations near windows, doors, or refrigerators where sudden changes can distort results.

Choose your work surface wisely

  • Use a solid, stable weighing bench to prevent vibrations

Consider lighting carefully

  • Avoid direct sunlight or heat from lamps.
  • Fluorescent lighting is generally best to prevent temperature fluctuations affecting measurements.

Monitor humidity levels

  • Maintain relative humidity between 45–60%.
  • Avoid extremes outside the 20–80% range to prevent measurement drift.

How should I set up and operate my balance? 

Keep it powered

  • Keep the balance connected to power continuously so it stays in standby mode.
  • This stabilizes internal components, improving measurement consistency.

Level before every use

  • Verify the balance is properly leveled before each use.
  • Check the level indicator and adjust the leveling feet as necessary.

Regular calibration is key

Calibrate regularly in the following situations:

  • First use of the balance
  • After changing its location
  • After leveling
  • After changes in temperature, humidity, or air pressure

Position the sample correctly

  • Center your weighing vessel on the pan
  • This simple step eliminates a common source of measurement inaccuracy

Zero and tare are important

  • Zero your balance before each measurement to establish a baseline
  • Use the tare function when weighing containers so only the net weight of the sample is measured, not the gross weight including the container

Choose the right vessel

  • Use the smallest suitable container for your sample.
  • Avoid materials that generate static charges, such as glass or plastic.
  • Ensure both the container and sample have equilibrated to room temperature, avoid direct handling after oven drying or washing.

Keep it clean

  • Regularly clean the weighing chamber and pan with a lint-free cloth and mild cleaning fluid
  • This prevents debris from affecting measurements and ensures the balance remains in optimal condition

Some of our balances

Analytical balances
Waterproof precision balances
moisture analyzers

BH-T/BH-Series 

Premium semi-micro and analytical balances with advanced sensor technology

FX-i WP Series

Dust and waterproof precision balances with external calibration

Moisture Analyzers

Moisture analyzers with straight halogen lamp and super hybrid sensor 

How can we help you?

FAQ

Why is accurate weighing so important in the lab?

Precise measurements ensure reliable results in experiments and processes. Even small errors can lead to incorrect conclusions or compromised product quality.

In a vibration-free room, away from drafts, electrostatic charges, and temperature fluctuations. Avoid placing it near windows, doors, or refrigerators.

Direct sunlight and heat from lamps can distort measurements. Position your balance away from these sources, fluorescent lighting is ideal.

Maintain relative humidity between 45–60%. Avoid extremes outside the 20–80% range.

Yes. Keeping it connected to power and in standby mode helps maintain a stable internal temperature, improving consistency

Clean the weighing chamber and pan regularly with a lint-free cloth and mild cleaning fluid.

The post How to achieve accurate weighing in your lab appeared first on LabSPX.

]]>
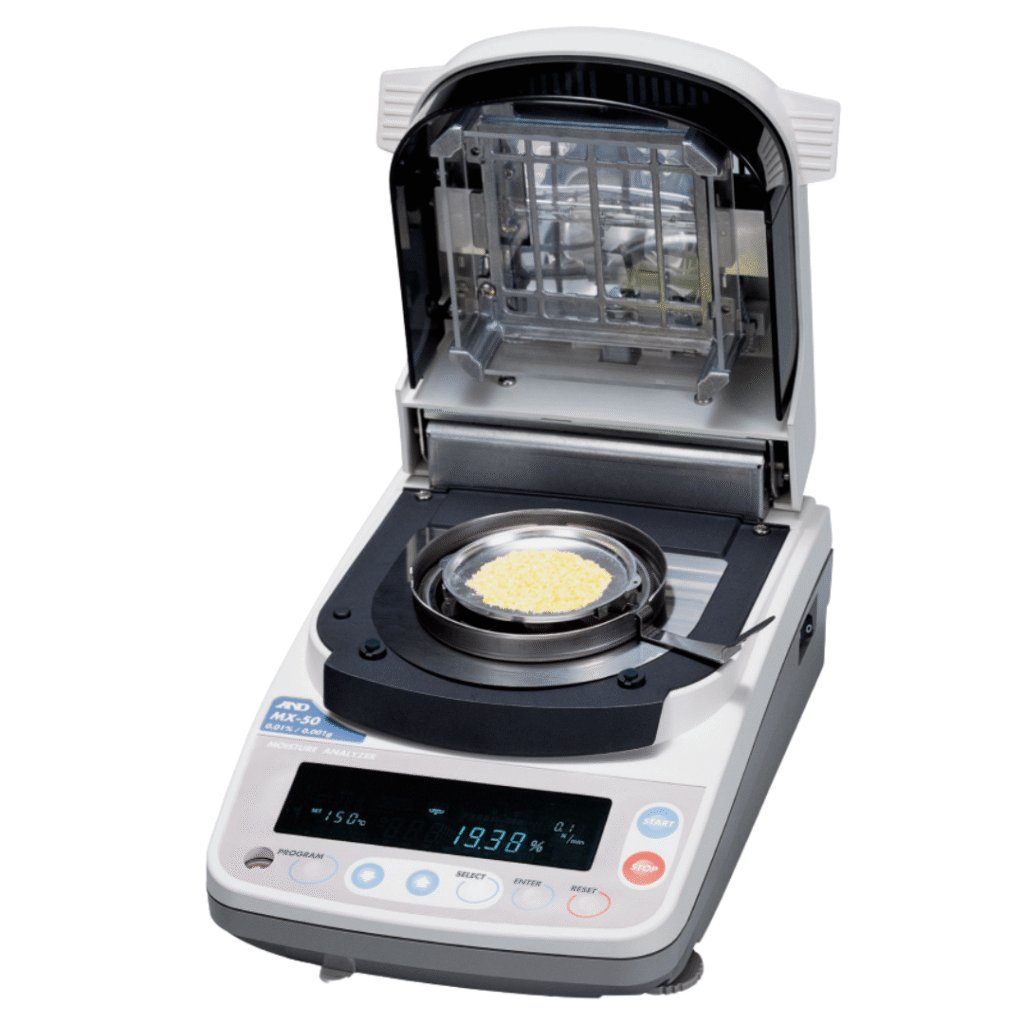
https://labspx.com/how-to-achieve-accurate-weighing-in-your-lab/feed/ 0
How to stay safe with your Chemical Fume Hood https://labspx.com/how-to-stay-safe-with-your-chemical-fume-hood/ https://labspx.com/how-to-stay-safe-with-your-chemical-fume-hood/#respond Thu, 13 Nov 2025 08:40:00 +0000 https://labspx.com/?p=2463 What is a Fume Hood? A chemical fume hood is one of the most important safety devices in any laboratory. It protects you from hazardous fumes, gases, vapours, aerosols, and dust by drawing contaminated air away from your breathing zone and safely venting it outside the building. Simply having a fume hood isn’t enough, knowing […]

The post How to stay safe with your Chemical Fume Hood appeared first on LabSPX.

]]>

What is a Fume Hood?

A chemical fume hood is one of the most important safety devices in any laboratory. It protects you from hazardous fumes, gases, vapours, aerosols, and dust by drawing contaminated air away from your breathing zone and safely venting it outside the building.

Simply having a fume hood isn’t enough, knowing how to use it properly is key to keeping yourself, your equipment, and your lab colleagues safe.

How does a Fume Hood work?

Air from the lab is pulled into the hood, where it mixes with hazardous vapours inside. This contaminated air is then drawn away from the user and evacuated through ductwork at the top of the building.

When used correctly, a fume hood provides protection for:

  • The user
  • Laboratory equipment
  • Colleagues in the lab

Key Component of a Labconco Fume Hood

Understanding the parts of your fume hood helps you use it safely and effectively:

  • The Sash is the glass barrier at the front of the hood. It acts as a shield between you and the hazardous materials inside.
  • Baffles are panels at the back of the hood that direct airflow away from the user.
  • The Air Foil (sill) is an aerodynamic component located at the bottom of the face opening. It allows air to enter even when the sash is closed.  

Important: never operate a fume hood without the baffle and air foil. These are critical for safe performance!

Built-in services

Most fume hoods are equipped with services such as:

  • Water
  • Air
  • Gas
  • Electrical fixtures

Every hood must also have an airflow monitoring device to ensure safe operating conditions:

  • If the monitor shows an alarm, stop working immediately
  • Resolve the issue before continuing any work inside the hood

    Certification matters

    Fume hoods must be certified regularly to confirm they’re functioning properly. Look for a certification sticker on the front fascia.

    If your hood is past its certification date, do not use it until it’s been recertified by a qualified technician.

    Safety tips for everyday use

    To maximize safety while using a fume hood, follow these guidelines:

    • Keep your head out of the hood: the interior is always a contaminated space.
    • Stay behind the sash: place all hazardous materials at least 15 centimeters inside the hood.
    • Elevate equipment: this improves airflow underneath and helps clear contaminants.
    • Don’t block the sill or baffles: obstructions can cause uneven airflow and loss of containment.
    • Avoid using the hood for storage: store chemicals in proper cabinets when not in use.
    • Adjust the sash properly: keep it at a comfortable working height, just above your elbows.
    • Close the sash when not in use: this helps contain any residual fumes.
    • Keep flammables away from heat sources: if they must coexist, separate them as much as possible.
    • Never use perchloric acid in a standard hood: it requires a specially designed system to prevent dangerous buildup and ignition.

    How can we help?

    FAQ

    What is a fume hood and why is it important?

    A fume hood is a critical safety device in any laboratory. It protects users from hazardous fumes, vapors, gases, aerosols, and dust by drawing contaminated air away from the breathing zone and venting it outside the building.

    The hood pulls lab air into its enclosure, mixes it with hazardous vapors, and then evacuates the contaminated air through ductwork. This process keeps harmful substances away from the user and maintains a safe working environment.

    • Sash: The glass barrier at the front that shields you from hazardous materials.
    • Baffles: Panels at the back that direct airflow away from the user.
    • Air Foil (sill): Located at the bottom of the opening, it ensures airflow even when the sash is closed. Never operate a fume hood without the baffles and air foil, they are essential for safety.

    These components control airflow and help contain hazardous vapors. Removing them can cause airflow disruption, reduce containment, and significantly increase the risk of chemical exposure.

    Many fume hoods include utilities such as water, gas, air, and electrical outlets. They must also be equipped with an airflow monitoring device. If the monitor alarms, work should stop immediately until the issue is resolved.

    Fume hoods must be certified regularly by a qualified technician to ensure proper airflow and safe operation. Certification information is usually displayed on a sticker on the hood. If the hood is past its certification date, it should not be used until inspection is complete.

    Your head should always remain outside the hood; the interior is considered a contaminated space. Keep your body behind the sash and place all chemicals or equipment at least 15 centimeters inside the hood to ensure proper containment.

    Raising equipment slightly allows air to flow underneath, improving overall ventilation and helping contaminants move toward the exhaust system efficiently.

    The post How to stay safe with your Chemical Fume Hood appeared first on LabSPX.

    ]]>
    https://labspx.com/how-to-stay-safe-with-your-chemical-fume-hood/feed/ 0